The following video is generic exchange instruction using Olympus OM-1.
After that, Leica M leather exchange is explained. In addition, note for the Rolleiflex 2.8f is added.
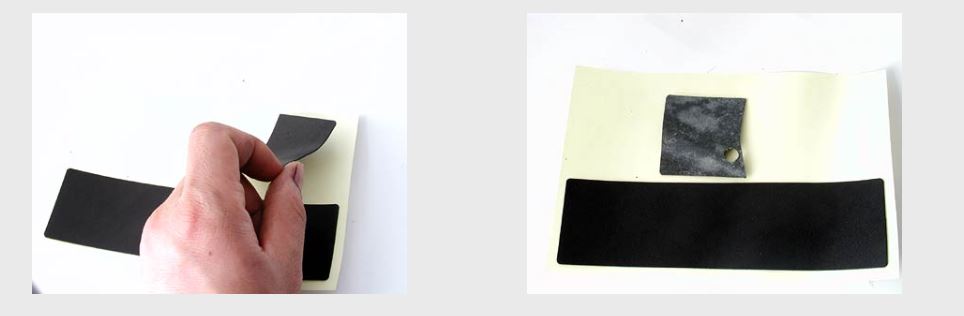
Prepare:
1) Water
2) anhydrous alcohol
3) Bamboo toothpick
4) Swab
5) Blow dryer
For complex shape, I recommend put enough alcohol for adjusting locations or remove&retry.
Using the alcohol is better in operations than water to relocate the leather easily.
Use fabric glue if fitting is not enough to the sharp edge.
Note:
For Canon F-1/Canon 7
1) Remove Logo plate at the back pannel.(F-1)
2) Use fabric glue at edge of body since leahter will take away from edge. Other part: Water or Alchohol OK for the leather when attaching.
3) For Self-timer lever part, slide the leathe inside the lever, with water/alcohol attached for easier sliding.
For Sony RX100, water puttig places are described in the following pictures.
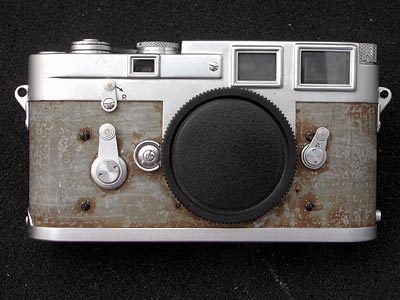
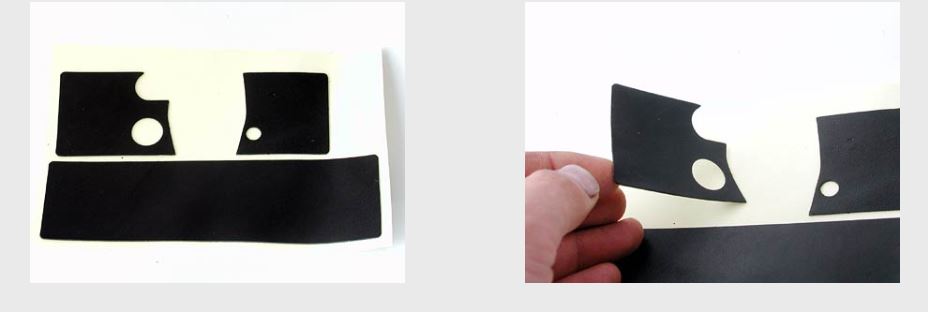
LEICA M series Skin Exchanges
- Peel off the old skins and clean surface.
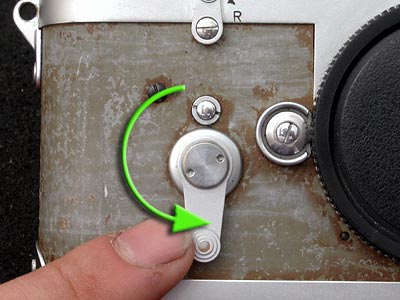
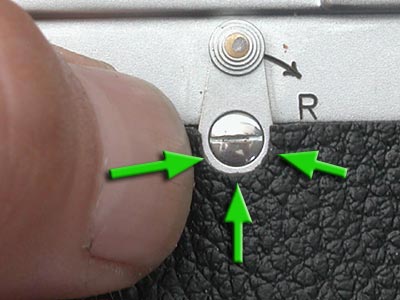
2. Set self-timer ‘Set’ position.
3. Take off new skins.
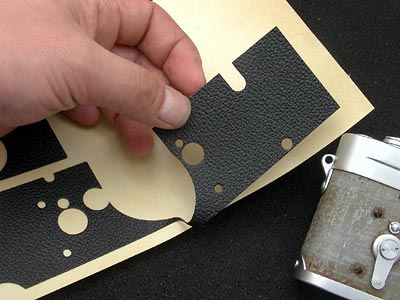
4. Put the skin
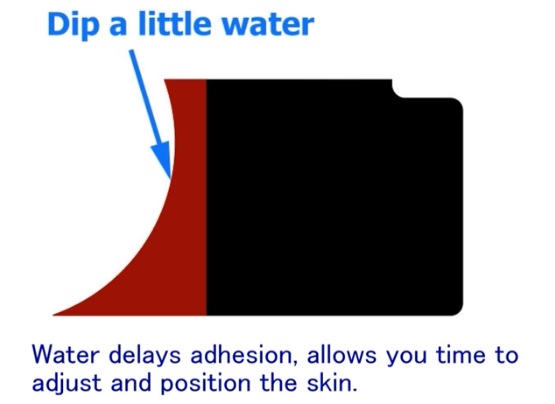
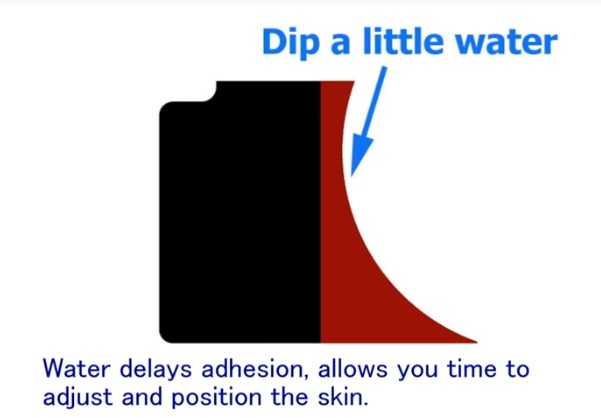
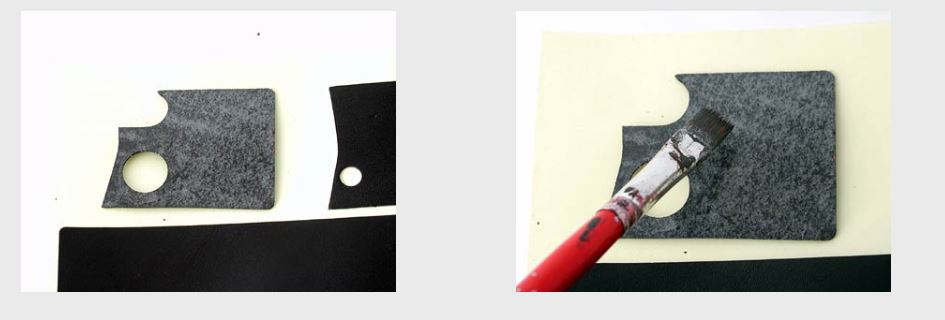
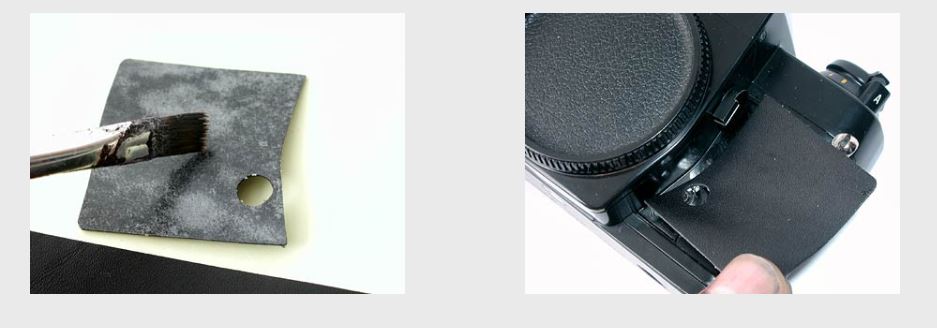
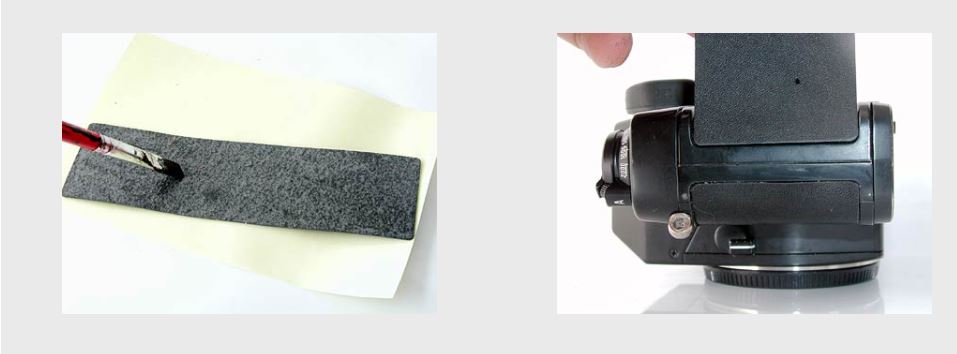
Before putting the skin, put water or anhydrous alcohol to the surface of the skin enough so to adjust locations easily. If failed to correct positioning, you can peel off and can retry it.
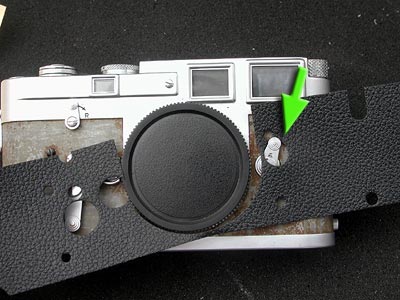
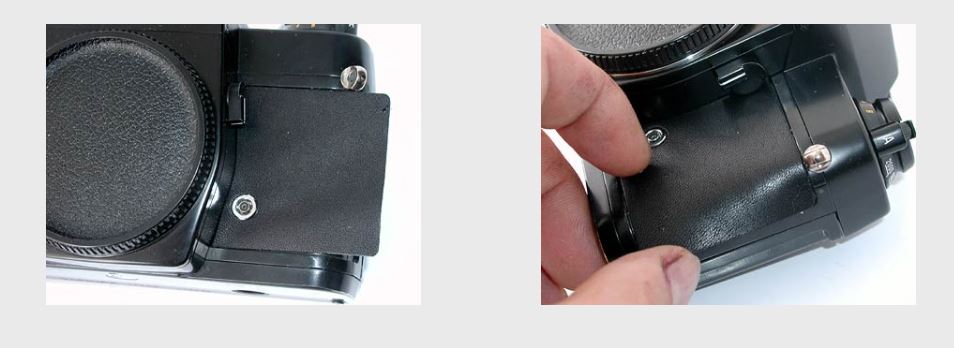
Locate edtes of skin to the edges of camera part, before pusing skin to the camera body.
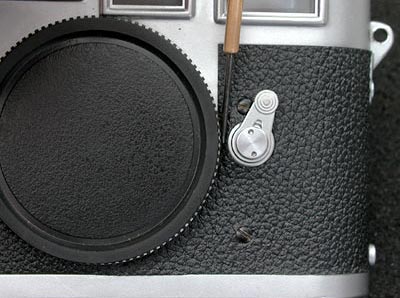
Slide from bottom around the self-timer part.
Adjust locaitons to each parts before pushing skin to the body for adjustment purpose.
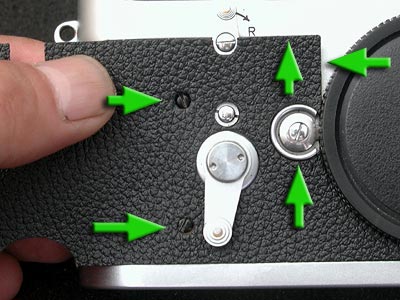
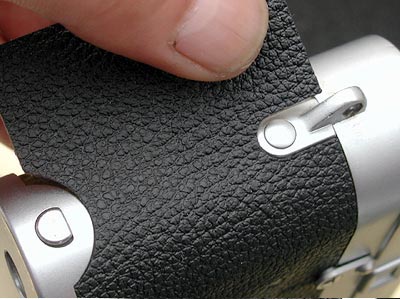
Push skin from the bottom to a release lever.
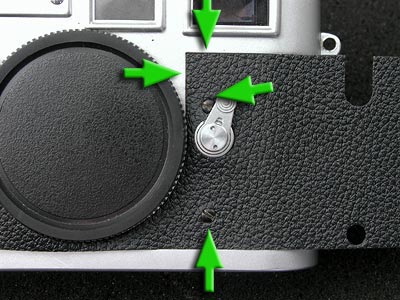
Adjust location to a lug and notch.
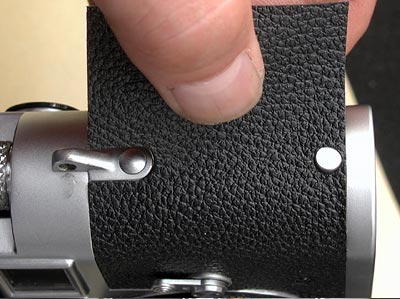
Same to the other side adjusting each locations.
Push skin to the narrow location using small flat screwdriver.
Same pushing to locations around self-timer.
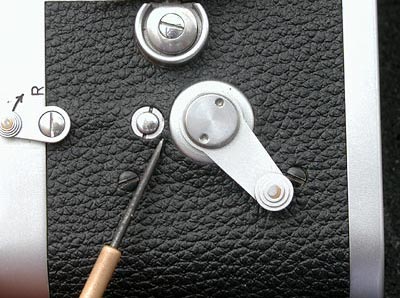
There are some spaces near selftimer, so push skins using the screwdriver.
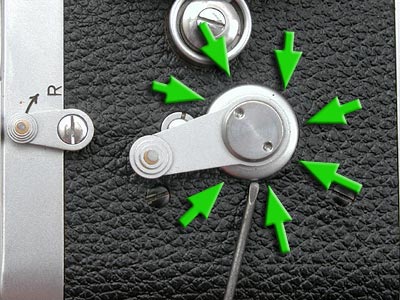
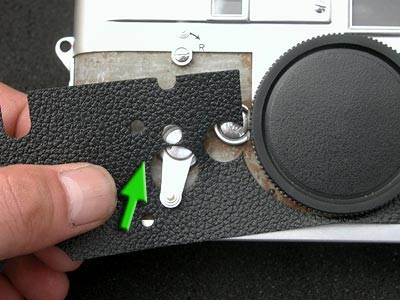
Push every skiins to the body for final fix.
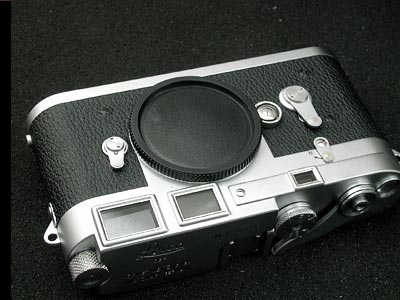
– End of operations
LEICA M series Skin Exchanges
- You don’t need to remove screws from bofy, but temp remove battery cover for skin attachment.
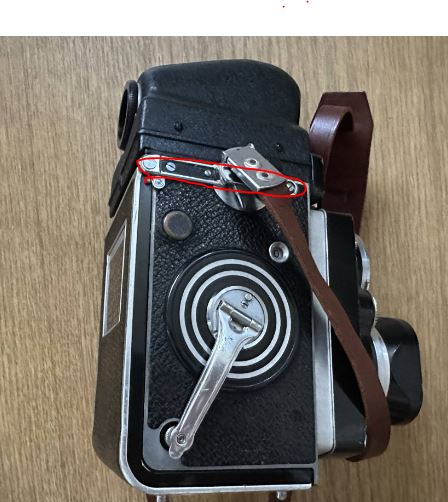
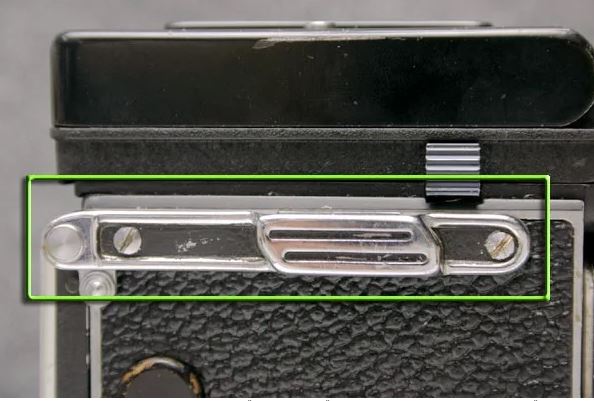
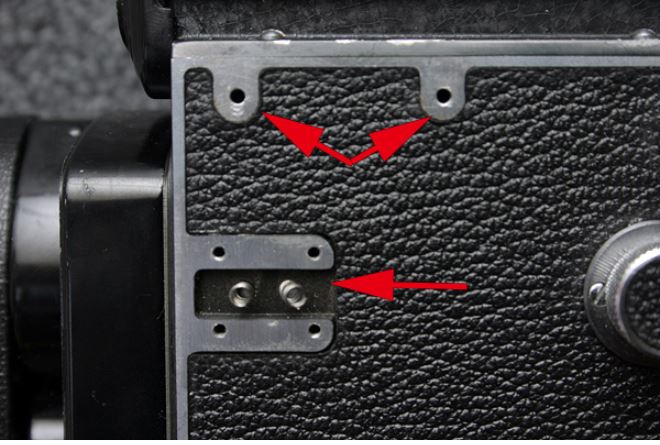
Rolleiflex 2.8F Skin Exchanges note.
First, it is necesarry to remove the screws holding the strap lugs in order to install the leather, as shown in red circle.
Mamiya M645 Skin Exchanges note
Since round part is easy to take off, I recommend additionally putting glue for rubber to red locations in the following photo.
Fujifilm X-Pro1 Skin Exchanges note
For the type of No grip, after removing the grip, do not put screws again. Instead put metal circular plates included on holes of the screws and put skins over them.
Yashica 634 Skin Exchanges note
Remember the screw length and screw washers location for these screws unscrewing by flat screwdrivers since the length is different and washers location maybe.
 .
.
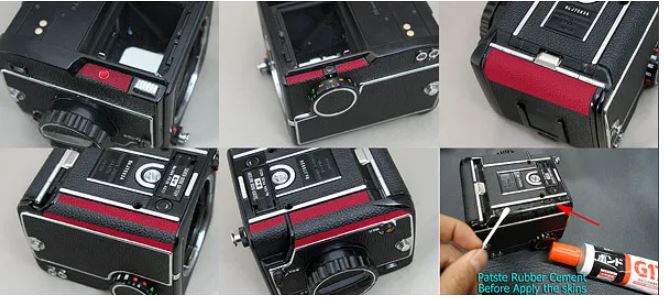
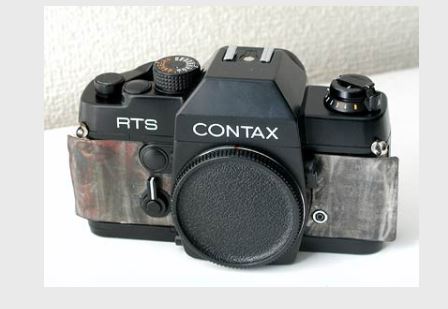
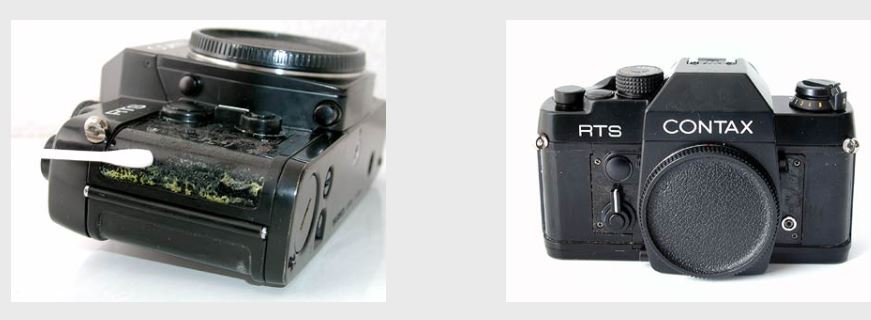
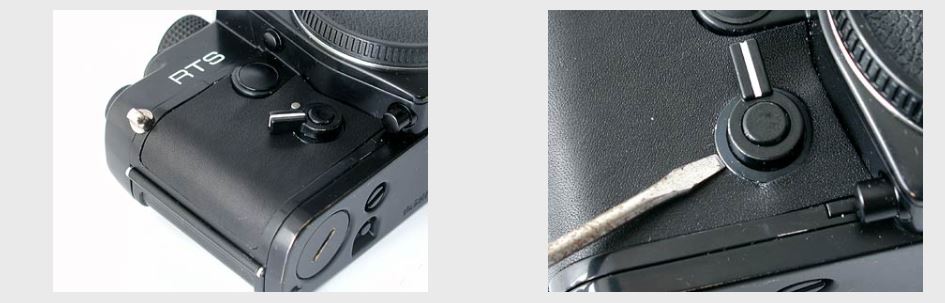
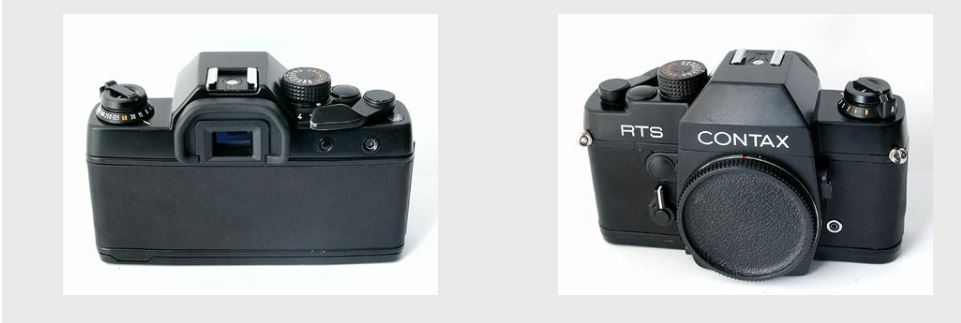
Contax RTS Skin Exchanges
Prepare:
1) Water or anhydrous alcohol
3) Pencil or tweezers to remove old skins
4) Plyer to remove metal pannels
5) Flat screwdriver
For complex shape, I recommend put enough alcohol for adjusting locations or remove&retry.
Using the alcohol is better in operations than water to relocate the leather easily.
- Remove skin from edge by pencil. It is easier removement by putting the alchohol onto the surface or the pencil.

2. Remove the skin slowly.
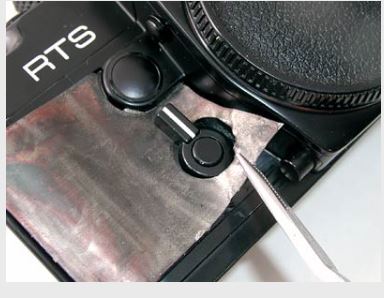
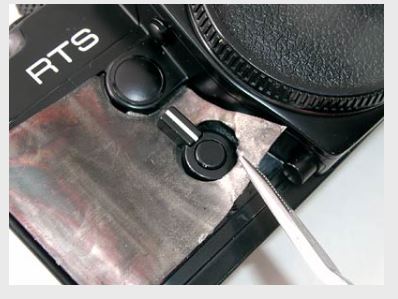
3. There are metal pannels at front. The right panel can be removed easily.

4. It is a little difficult to remove left metal. Take off slowly by plyer, not to scratch the camera body by metal edges, carefully.
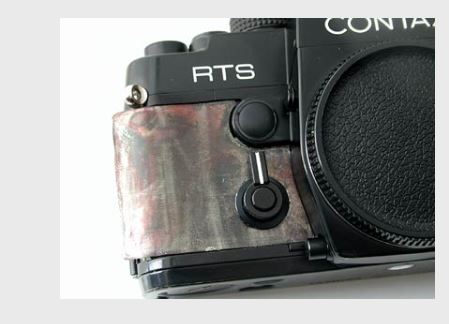
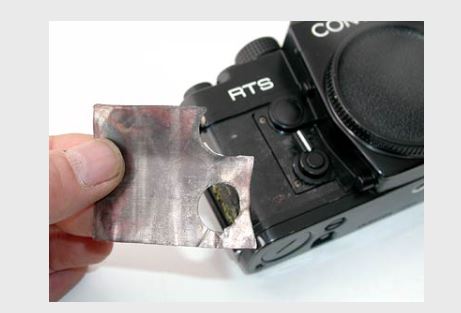
5. Remove residual glues by alcohol to clean before putting new skins. Right photo is the body ready for new skin putting.
6.Take the left skin. If you put alcohol on your finger, it does not stick to the finger.
7. Flip the skin and put alcohol on it to the level that it does not stick to your finger.
8. Put self-timer on position for easier access and slide the skin under the timer to just fit position. 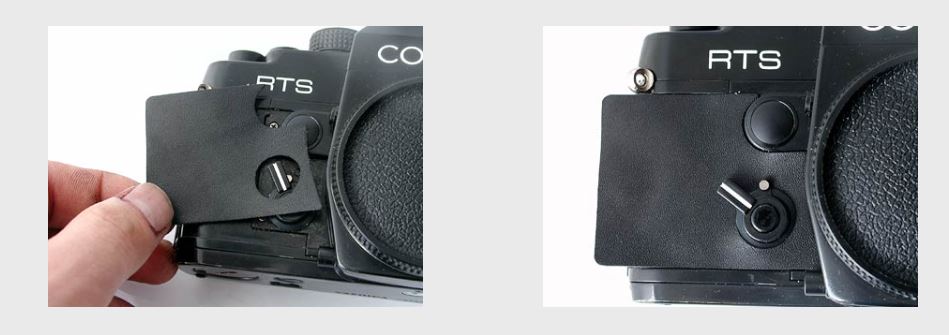
9.Pay attention to locate edge to put correctly; if alcohol is enough, skin can be easily relocated for adjustment of location. Use flat screwdriver to put skin near self-timer.
10. Prepare right skin and put it just focusing strobe connecter location first.
11. Last putting the edge.
12. Take last skin and locate it from the edge.
13. Locate edge top and bottom to just fit!
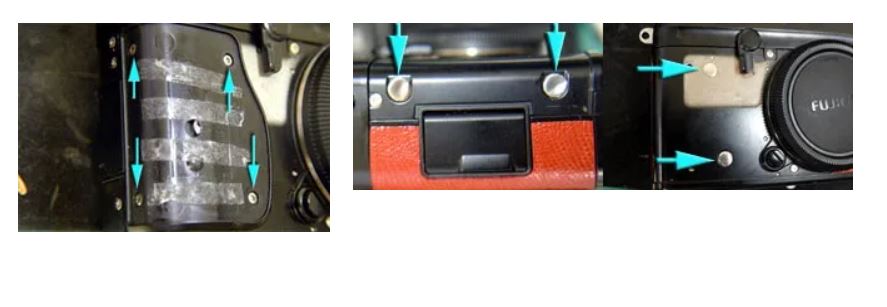
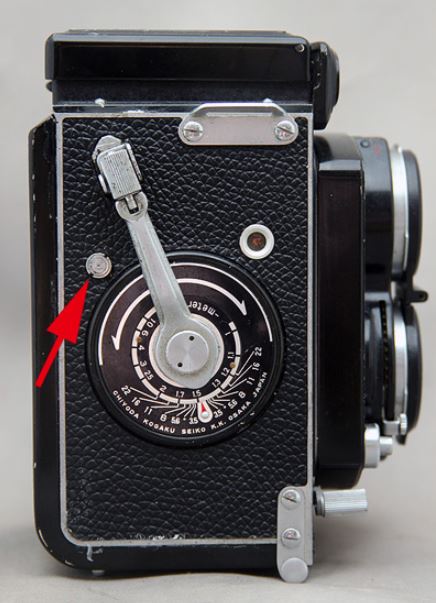
Minolta AutoCordSkin Exchanges note
It is necessary to remove all of strap metal, strobe shoe and parts near crank lever( It can be removed counter-clockwise by adjustable pin spanner.)
IMPORT FROM JAPAN LOCAL SITES: VISIT THIS SITE FOR SUPPORT!
839073 942588Its like you read my mind! You appear to know a whole lot about this, like you wrote the book in it or something. I believe which you could do with several pics to drive the message home a bit, but other than that, this really is wonderful weblog. A fantastic read. Ill undoubtedly be back. 492223